Django Introduction Part3 - Database
Django uses an Object-Relational-Mapper (ORM) to map model definitions in the Django code to the data structure used by the underlying database. As we change our model definitions, Django tracks the changes and can create database migration scripts (in /yourproject/yourapps/migrations/) to automatically migrate the underlying data structure in the database to match the model.
Makemigrations & Migrate
When we created the website Django automatically added a number of models for use by the admin section of the site (which we’ll look at later). Run the following commands to define tables for those models in the database (make sure you are in the directory that contains manage.py):
Some of these applications make use of at least one database table, though, so we need to create the tables in the database before we can use them. To do that, run the following command:
1 | $python manage.py makemigrations |
Important:
You’ll need to run the above commands every time your models change in a way that will affect the structure of the data that needs to be stored (including both addition and removal of whole models and individual fields).
The makemigrations command creates (but does not apply) the migrations for all applications installed in your project (you can specify the application name as well to just run a migration for a single project). This gives you a chance to checkout the code for these migrations before they are applied — when you’re a Django expert you may choose to tweak them slightly!
The migrate command actually applies the migrations to your database (Django tracks which ones have been added to the current database).
You can see from your yourapps/migrations/0001_initial.pythat would be like this:
1 | import django.core.validators |
Let’s run another command to print the sql grammar like code, the sqlmigrate command takes migration names and returns their SQL (0001_initial.py):
1 | python manage.py sqlmigrate movie 0001 |
You should see something similar to the following (we’ve reformatted it for readability)::
1 | BEGIN; |
Note the following:
- The exact output will vary depending on the database you are using. The example above is generated for SQLite.
- Table names are automatically generated by combining the name of the app and the lowercase name of the model. (You can override this.)
- Primary keys (IDs) are added automatically. (You can override this, too.)
- By convention, Django appends
"_id"to the foreign key field name. (Yes, you can override this, as well.) - The foreign key relationship is made explicit by a
FOREIGN KEYconstraint. Don’t worry about theDEFERRABLEparts; that’s just telling SQLite to not enforce the foreign key until the end of the transaction. - It’s tailored to the database you’re using, so database-specific field types such as
auto_increment(MySQL),serial(PostgreSQL), orinteger primary key autoincrement(SQLite) are handled for you automatically.
If you’re interested, you can also run python manage.py check; this checks for any problems in your project without making migrations or touching the database.
1 | System check identified no issues (0 silenced). |
Now that we’ve updated our models, we’ll need to make fresh migrations on the project and then apply those migrations:
1 | python manage.py makemigrations |
Playing with the API
Now, let’s hop into the interactive Python shell and play around with the free API Django gives you. To invoke the Python shell, use this command:
1 | $ python manage.py shell |
You can search for records that match a certain criteria using the model’s objects attribute (provided by the base class).
We can get all records for a model as a QuerySet, using objects.all(). The QuerySet is an iterable object, meaning that it contains a number of objects that we can iterate/loop through.
1 | ## Import the model classes we just wrote. |
Django’s filter() method allows us to filter the returned QuerySet to match a specified text or numeric field against a particular criteria. For example, to filter for directors that contain “hitchcock” in his/her name filter for movie directors that contain “hitchcock” in his/her name or and then count them, we could do the following.
1 | Director.objects.filter(director_name__contains='hitchcock').count() |
The fields to match and the type of match are defined in the filter parameter name, using the format: field_name__match_type (note the double underscore between title and contains above). Above we’re filtering title with a case-sensitive match. There are many other types of matches you can do: icontains (case insensitive), iexact (case-insensitive exact match), exact (case-sensitive exact match) and in, gt (greater than), startswith, etc.
Django provides a rich database lookup API that’s entirely driven by keyword arguments.
1 | Movie.objects.filter(movie_title__startswith='Saw') |
We can also create a new Movie.
1 | from django.utils import timezone |
1 | m2 = Movie.objects.get(pk=10) |
We’re using this instead of simply typing “python”, because
manage.pysets theDJANGO_SETTINGS_MODULEenvironment variable, which gives Django the Python import path to yourmovies/settings.pyfile.
It’s important to add
__str__()methods to your models, not only for your own convenience when dealing with the interactive prompt, but also because objects’ representations are used throughout Django’s automatically-generated admin.
Note these are normal Python methods. Let’s add a custom method, just for demonstration:
ratings/models.py
1 | import datetime |
Note the addition of
import datetimeandfrom django.utils import timezone, to reference Python’s standarddatetimemodule and Django’s time-zone-related utilities indjango.utils.timezone, respectively. If you aren’t familiar with time zone handling in Python, you can learn more in the time zone support docs.
Save these changes and start a new Python interactive shell by running python manage.py shell again:
1 | # Get the question that was published this year. |
we can also this API to create users here:
1 | from django.contrib.auth.models import User |
MYSQL Database
Because we are using SQLite, we don’t need to do any further setup above. Let’s move on to set up using mysql!
Coz django is one of the best known web frameworks for Python, and the good news is that it works out of the box with MySQL Server 8.
1 | mysqld.exe -install |
If you encounter the error likeMySQL 服务无法启动。服务没有报告任何错误。 on your computer.
You cam try:
1 | mysqld -remove MySQL |
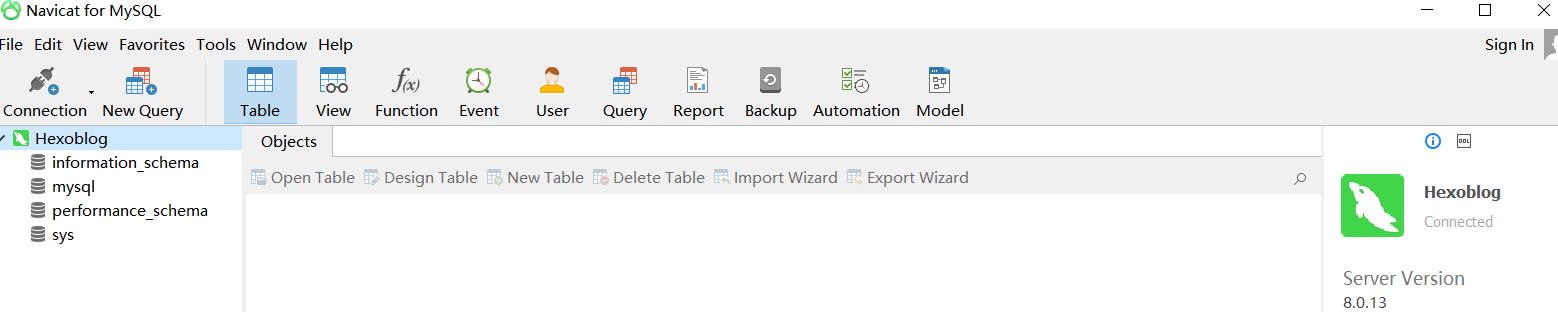
Then ,using Navicat for MYSQL,it connected!
If you want to create a user, it will more complicated then MYSQL5.7,
1 | create user 'flur'@'%' identified by 'florence'; |
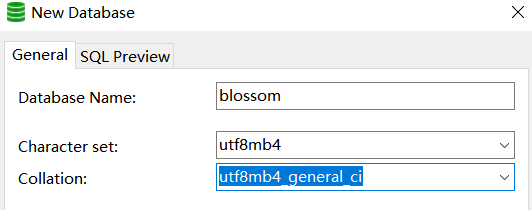
Create a database names blossom,
Open reverie/setting.py, change the database settings:
1 | DATABASES = { |
Next, install mysqlclient,
1 | conda install mysqlclient |
Postgresql Database
REFERENES
For More Reference,See